So, you want to start a vegetable garden? That’s great news! Growing your own veg is a wonderful hobby, and can make a real difference to your diet and your bank balance. But it can also be hard work, and there’s a learning curve, so it’s important to get off to a good start.
You may not have a choice about where to put your veg patch, but if you do then there are some important things to consider. The first is aspect – which way your plot is oriented has an effect on what you can grow. The best possible site for a vegetable garden is a sunny, south-facing spot with a slight slope… but you have to work with what you have.
If you’re lucky enough to have a south-facing patch free, then there are plenty of plants that will be happy there, soaking up the sunshine (particularly in winter) and the extra warmth. Tomatoes, peppers and other tender annuals will bask in the sun, and you may even be able to grow more unusual crops – such as melons and sweet potatoes. There is a downside, though, as sunnier patches dry out more quickly in dry weather, so you’ll spend more of your summer watering your plants.
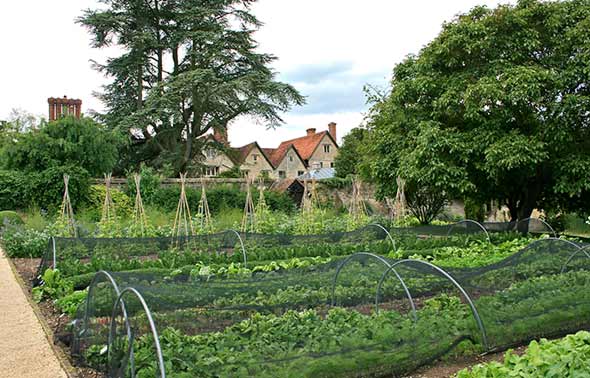 A south facing vegetable plot. The trees don’t shade the vegetables.
A north-facing garden will be cooler, and may be prone to frost and shade. If there’s too much shade then that will limit the crops you can grow, but the leafier vegetables such as lettuce and other salad leaves will enjoy the cooler climate. They’ll thrive alongside herbs such as mint and lemon balm.
A different aspect will give you a combination of both effects, and it’s worthwhile getting to know your garden. Each one is unique, and your layout is likely to give rise to microclimates – damp or dry areas, slopes and contours that channel water (and frost), hot or cold spots, and shade. The key is designing a planting plan that works for your garden and its characteristics.
When you’re starting a plot it’s best to be realistic about the time and energy you’ll have to devote to it.
Whilst you may be dreaming of a small field with a bountiful array of crops, if you’re new to gardening it’s best to start off more modestly. If you find you’re coping well with your small plot then you can expand next year – you’re far more likely to continue that way than by taking on too much at once and being overwhelmed and demoralised by the work and the weeds.
For complete beginners, an area that’s one or two square metres is a good place to start. It gives you the space to try your hand at a few different crops, but won’t be overwhelming.
When you’re ready to expand you can add another couple of metres, and start a proper crop rotation to prevent the build-up of pests and diseases. A full-sized allotment or a big garden is a lot of work, even if it’s not weedy when you take it on, and so is best suited for an experienced gardener, or one with a lot of help! That doesn’t mean you can’t take on an allotment, just that you should try and reduce the work load in the first couple of years. You could cover the unused part of the plot in a mulch, or plant a long-standing green manure, to keep it under control while you battle with the rest!
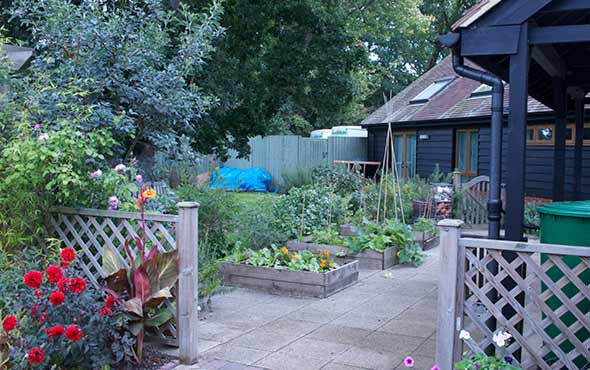 Small raised beds a couple of square meters in size are easy to start with.
The crops you choose can also play a big part in how much work there is to do, and a crop plan is important. If you have an allotment away from the house, or you know there will be periods when you will be too busy to garden, then perennial crops are more able to take care of themselves, as are potatoes and Jerusalem artichokes. Salad crops and strawberries need a bit more TLC – it’s not that they’re hard work, just that they need a steady stream of attention.
Another thing you don’t have a lot of control over is the type of soil. Mineral soils (all soils except those which are 100% peat) are formed from the underlying rocks, so you get what you’re given. Of course, we also do lots of horrible things to our soil, so you may find you don’t have much at all (if you’re in a new build house, for example). Industrial sites can have contaminated soil, so it’s always worth checking that out before you start planting. However, you can always build raised beds and fill them with a suitable soil mixture, so soil doesn’t have to be a stumbling block.
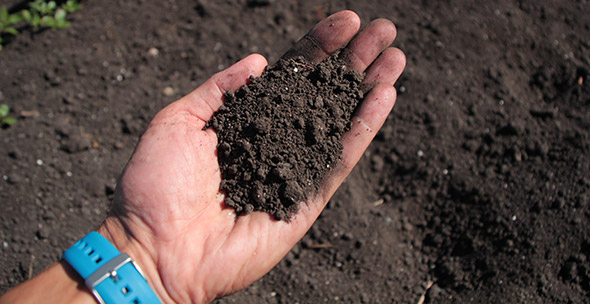
If you take a look at your soil you can do a bit of assessment of what you have. Dig a hole to see whether it’s dry under the surface. If it’s crumbly and gritty, then you have a sandy soil that is likely to be well drained and never waterlogged in winter; the flip side being that it doesn’t hold water and will need more irrigation. Sandy soils warm up more quickly in spring, and get you off to a flying start.
Clay soils can bake dry in summer, leading to big cracks, and be cold and wet in winter. You’ll be able to work a wet sample into a ball. Clay soil takes longer to warm up in spring, but holds more water and nutrients than a sandy soil, so is less work later in the year.
Most soils are a mixture of types, so have a good look and see what you think of yours. If you want to know its pH (how acidic or alkaline it is) then you’ll need a probe or a testing kit. The pH of your soil determines what you can grow – some specialised plants can cope with very acidic or alkaline soils (e.g. ericaceous plants like blueberries, which love acid soil), but most common crops like something neutral – close to a pH of 7.
It is possible to amend your soil to something better for veg growing, but it’s hard work on a large scale. The easiest thing to do is to make plenty of compost and incorporate it into the soil every year. Organic matter is a magical thing that can improve both water retention and drainage, and help plants cope if the pH isn’t entirely to their liking. It also contains plant nutrients, and supports the community of life in the soil – healthy soil grows healthy plants.
Depending on what you want to grow, you may also want to amend your soil with garden lime or well-rotted manure (never both at the same time).
Is the patch you’ve chosen currently lawn? If so then you can cut the turf, stack it upside down and leave it to become a nice, rich friable soil you can use later. Most likely, though, your kitchen garden is currently an unloved mess of weeds, and it’s time to become a bit of a weed detective.
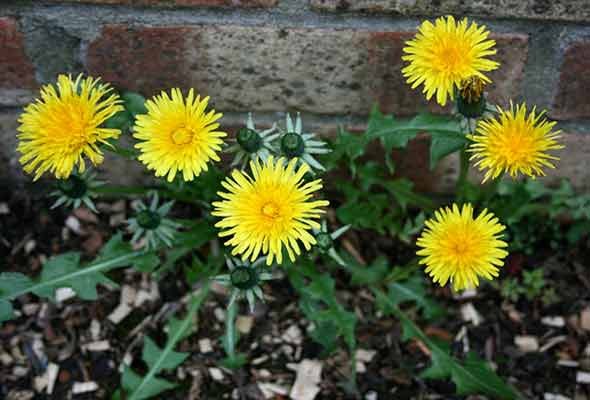
It’s important to find out which weeds are perennial, and which are annual, as they are treated differently. Perennial weeds such as dandelions and brambles are more difficult to remove, but once you have they shouldn’t return in a well-tended plot. Realistically they do need digging out, unless you resort to weedkiller (which I wouldn’t recommend). They can be killed off over time by excluding light, but… it’s a slow process. Rotovating (mechanically digging) will most likely chop up perennial weeds and make more of them, so it’s not recommended either. Take some time and get the pesky things out now, it will save you a lot of unpleasant problems later on.
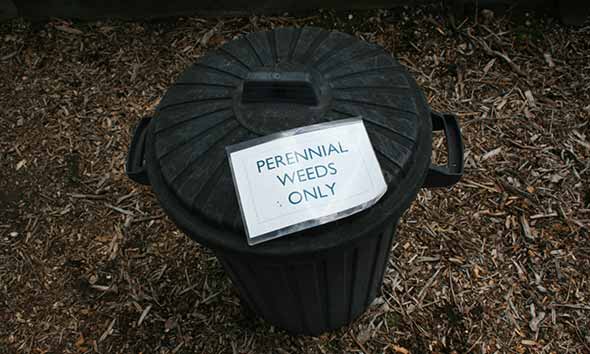 Perennial weeds are binned so they aren’t recycled back into the soil.
The one thing you can’t remove, of course, is tree roots if you want the tree to live. They will suck moisture and nutrients out of the soil, so try and site your plot where there are no trees to cause an issue. A big tree will also cast shade (and some, such as walnuts, produce chemicals that stop plants growing nearby), so bear that in mind too.
Annual weeds, which complete their seed-to-seed cycle in a year, are easier in some ways. You can kill them off and stop their seeds germinating by excluding light. A mulch (covering layer) on top of the soil over the winter will sort out most of them for you. But… there will be viable seeds left in the soil, and they will blow in from everywhere, so you can’t entirely avoid weeding. Digging less brings fewer seeds to the surface, and mulches keeps seeds from germinating. Beyond that, it’s time to get handy with a hoe!
If you want to sow seeds in your plot then it’s worthwhile using the ‘stale seedbed’ technique. This involves clearing the soil ready to sow, but then waiting for a couple of weeks. The weed seeds will germinate, and you can how them off. Now when you sow there’s a much better chance of your crop coming up without weeds.
What to do with all those weeds? You can safely add annual weeds to the compost heap, as long as they aren’t seeding. Seeding weeds and perennial weeds could cause problems on the heap, so require more comprehensive disposal. Some people turn to bonfires, but you can also drown them in a bucket for a few weeks until they start to rot, and then put them on the compost heap. Or send them off for municipal composting if you have a collection – commercial heaps are hot enough to kill perennial weeds and weed seeds.
Traditionally, vegetable plots have been ‘double dug’, a time consuming process involving a lot of hard work. When double digging, gardeners dig down two ‘spits’ – spade depths. The top soil is removed and put to one side, whilst the subsoil is left in place but dug over. The top soil is then mixed with soil amendments (usually well-rotted manure) before being put back. The result is a good depth of soil that’s easy for plant roots to penetrate, and topsoil ready for planting. (Mixing subsoil and topsoil is not a good idea. Topsoil is where all the good stuff for plants is found, subsoil is lower quality – from a plant’s perspective).
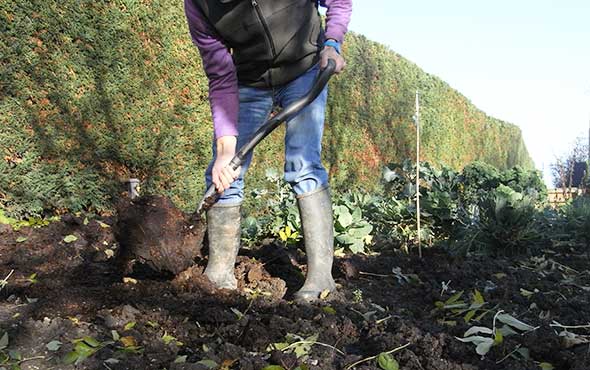
For most gardens now this would be considered to be overkill. Many allotmenteers follow a routine of digging over their entire plot each year (often with a rotovator), leaving the subsoil undisturbed. The advantages of doing this is it gives you a surface ready to plant, relieves compaction and helps deal with weeds, and makes it easy to mix in soil amendments.
However, it can also damage the soil structure. An alternative it is to remove all the weeds and then follow a ‘no dig’ system. Rather than digging over the soil you let it be. Soil amendments are applied to the top, and worms and other soil organisms incorporate them into the soil for you. You avoid walking on the soil, so there isn’t a compaction issue, gardening in sections or raised beds rather than in rows across the whole plot. Over time, you’ll have soil teeming with life, which will take care of your plants for you. But if you’re starting with poor soil, it can take a while.
A halfway house is to dig when absolutely necessary – to remove weeds, or deal with compaction issues – and then follow no dig principles as much as possible.
The aesthetics of your kitchen garden may be uppermost in your mind, if you fancy a posh potager with geometric lines, or simply need to ensure that it is as good looking as possible, because you can see it from the patio doors. But even if looks aren’t that important, you need to think about the layout of the plot.
Ideally, you’ll have separate areas for growing, so that you can rotate your crops around. Any perennial plants, such as rhubarb and fruit bushes and some of the herbs, need to be somewhere they won’t be disturbed by any digging. Taller plants need to be at the north end of the plot, where the shade they cast won’t affect sun-loving species (although if you have no other shade it can be useful to grow something tall as a shade for lettuce and other cool weather crops).
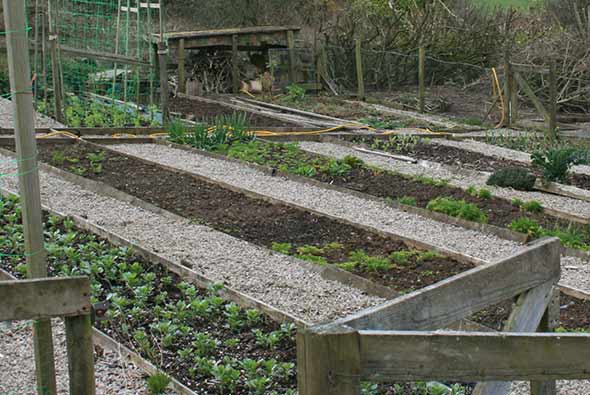 Vegetable beds with paths in between help with access.
If you’re having beds and paths then think about the size. Beds are most easily managed if you can reach into the middle from the edge – so don’t make them too wide. But make sure your paths are wide enough for a wheelbarrow if you use one (or a wheelchair if necessary), and think about how you’re going to maintain them. Permanent paths are expensive, but a good investment. Grass is fine if you’re happy mowing, but can get muddy. Bark chips are an option (needing occasional topping up), as is gravel.
Where’s the water coming from? Do you need a hosepipe? Is there somewhere you can put a water butt or two (plants are happiest with rain water, after all)? Where are you going to hide your compost heap?
The final thing to think about before you get stuck in is what equipment you’re going to need. Once a vegetable plot is up and running you can get away with very little, if you’re a no digger. A trowel and secateurs are essential, as is a watering can and some twine. A larger plot will require a hoe, and probably a fork. Diggers will need a spade, and canes are always useful. If you’re preparing soil or scooping away leaves then a rake is handy. Suitable footwear and some gloves, and you’re pretty much set.
Later on you may want to expand your armoury. A wheelbarrow is good on a large plot, and a riddle is useful for sieving lumps and stones out of soil. A pocket knife will make you feel like a proper gardener, as will a dibber marked with depth measurements. A trug for collecting your harvests, and a tin for your seeds (don’t keep it in the shed, try to minimise temperature fluctuations for seed storage), and a notebook for keeping track of what you’ve done and what you want to do next year.
And labels. Labels are important. Whilst you may be sure you’ll remember what you’ve planted and where… eventually you always forget. Plants aren’t always easily recognisable in the different stages of their lifecycle, and some disappear beneath the soil in the winter. Digging them up by accident is never the best news.
Of course, once you’ve got all that, and a thriving plot, your thoughts may turn to advanced topics such as extending the season. There are cloches and mini tunnels for small spaces and beginners, moving on to greenhouses and polytunnels for large gardens and keen gardeners. And cold frames and forcing pots, and fleece. But that’s a whole other topic. Best to keep things simple, for now!